

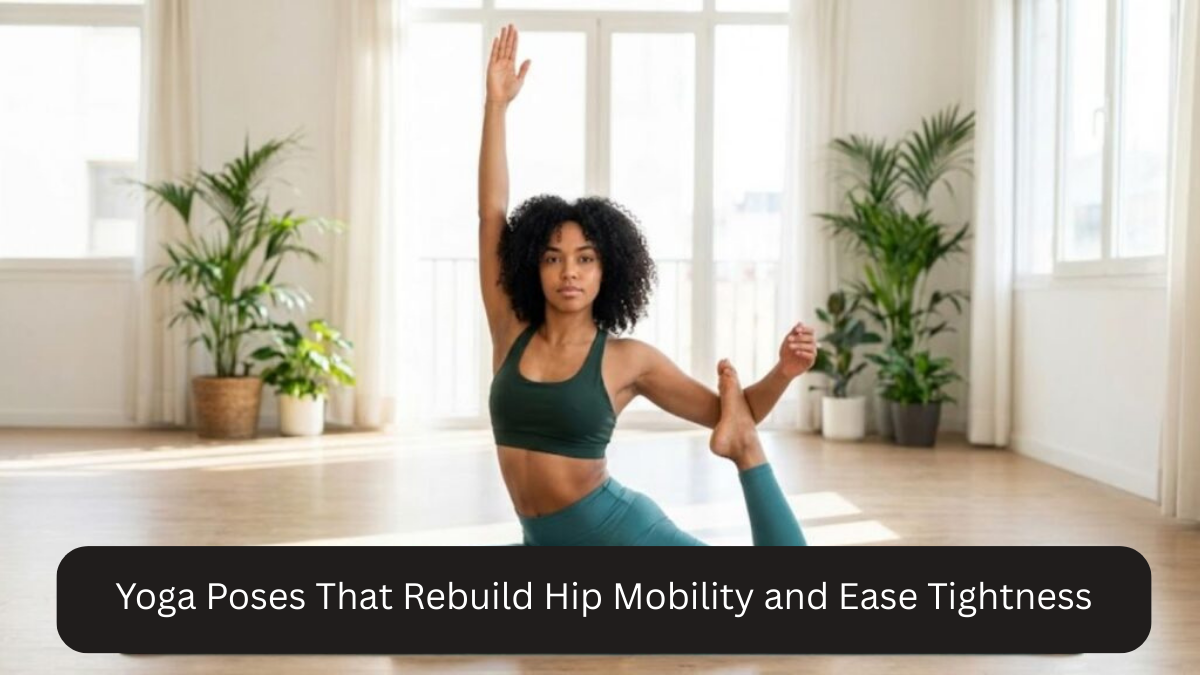
Modern life keeps many of us sitting for long hours—at desks, in cars, on couches, and even while scrolling on our phones. Over time, this sedentary pattern can leave the hips feeling stiff, tight, and restricted. Tight hips are not just uncomfortable; they can affect posture, reduce athletic performance, and even contribute to lower back pain and knee discomfort. The good news? Yoga offers a gentle, effective, and sustainable way to rebuild hip mobility while easing tension stored deep in the body.
Hip mobility is about more than flexibility. It involves strength, control, stability, and the ability of the hip joint to move through a healthy range of motion without pain. Yoga helps by combining stretching with mindful movement and breathwork, allowing you to release tight muscles, improve circulation, and restore function in the hip area. Whether you are a beginner or someone who exercises regularly, the right yoga poses can help your hips feel freer, stronger, and more balanced.


In this article, we will explore why hips become tight, how yoga supports mobility, and the best yoga poses to restore movement and reduce discomfort.
Why Hip Mobility Matters
The hips are one of the largest and most important joints in the body. They connect the upper and lower body and play a central role in walking, running, bending, climbing stairs, and maintaining posture. Because the hips are ball-and-socket joints, they are designed for movement in multiple directions—flexion, extension, rotation, abduction, and adduction.
When hip mobility is limited, the body often compensates in other areas. For example:
- The lower back may overwork, leading to stiffness or pain.
- The knees may absorb extra stress during movement.
- The glutes may become underactive, reducing stability.
- The hamstrings and hip flexors may tighten further, creating a cycle of restriction.
Good hip mobility supports:
- Better posture
- Easier walking and movement
- Improved athletic performance
- Reduced risk of injury
- Less lower back and knee discomfort
- Greater comfort during daily activities
Why Hips Become Tight
Hip tightness can happen for several reasons:
1. Prolonged Sitting
Sitting for long periods shortens the hip flexors and weakens the glutes. Over time, this creates stiffness and imbalance.
2. Lack of Movement Variety
If your daily routine involves repeating the same movement patterns—or very little movement at all—the hips lose range of motion.
3. Stress and Tension
Many people hold emotional stress in the hips and pelvis. This can lead to a feeling of “stored tension” that yoga helps release.
4. Intense Exercise Without Recovery
Runners, cyclists, and strength trainers often develop tight hip flexors, piriformis muscles, and outer hips if they don’t balance training with mobility work.
5. Age and Joint Stiffness
As we age, connective tissue can become less elastic, making regular mobility work even more important.
How Yoga Helps Rebuild Hip Mobility
Yoga is uniquely effective because it works on multiple levels:
- Lengthens tight muscles such as hip flexors, glutes, adductors, and hamstrings
- Strengthens stabilizing muscles around the hips and pelvis
- Improves body awareness so you move with better alignment
- Encourages nervous system relaxation, helping muscles release guarded tension
- Promotes circulation to tissues that may feel stuck or compressed
The key is consistency. A few minutes of mindful hip-opening yoga several times a week can make a noticeable difference over time.
Best Yoga Poses for Hip Mobility and Tightness Relief
Below are some of the most effective yoga poses to restore hip mobility. Move slowly, breathe deeply, and never force a stretch into pain.
1. Cat-Cow Pose (Marjaryasana-Bitilasana)
Although this is mainly known as a spine warm-up, Cat-Cow gently mobilizes the pelvis and helps prepare the hips for deeper work.
How to do it:
- Start on hands and knees.
- Inhale, arch your back, lift your chest and tailbone (Cow).
- Exhale, round your spine and tuck your pelvis (Cat).
- Repeat for 8–10 breaths.
Benefits:
- Warms up the pelvis and lower back
- Improves coordination between spine and hips
- Prepares the body for hip openers
2. Low Lunge (Anjaneyasana)
This pose deeply stretches the hip flexors, especially the psoas and quadriceps, which often tighten from sitting.
How to do it:
- Step one foot forward into a lunge.
- Lower the back knee to the mat.
- Shift your hips forward gently while keeping the chest lifted.
- Hold for 5–8 breaths, then switch sides.
Benefits:
- Opens tight hip flexors
- Reduces front-of-hip stiffness
- Improves posture after long periods of sitting
Tip:
Tuck the pelvis slightly to avoid dumping into the lower back.
3. Lizard Pose (Utthan Pristhasana)
Lizard Pose is excellent for targeting the hip flexors, groin, and inner thighs all at once.
How to do it:
- From a lunge, bring both hands inside the front foot.
- Slide the back leg farther behind you.
- Stay on your hands or lower to your forearms if comfortable.
- Hold for 5–8 breaths.
Benefits:
- Increases hip flexor mobility
- Opens the groin and inner thigh
- Builds deeper range of motion in the hips
4. Pigeon Pose (Eka Pada Rajakapotasana Prep)
Pigeon is one of the most popular yoga poses for the outer hips and glutes.
How to do it:
- From Downward Dog or tabletop, bring one knee forward behind the wrist.
- Angle the shin as comfortable.
- Extend the back leg straight behind you.
- Keep hips as level as possible.
- Stay upright or fold forward.
- Hold for 5–10 breaths, then switch sides.
Benefits:
- Stretches the glutes and piriformis
- Releases outer hip tension
- Helps reduce tightness from running or sitting
Modification:
If Pigeon feels intense, try Reclined Figure Four on your back instead.
5. Bound Angle Pose (Baddha Konasana)
This seated hip opener targets the inner thighs and groin, helping create more freedom in hip abduction and external rotation.
How to do it:
- Sit tall with the soles of the feet together.
- Let the knees drop out to the sides.
- Hold your feet or ankles.
- Sit upright or hinge forward slightly from the hips.
- Hold for 8–10 breaths.
Benefits:
- Opens inner thighs and groin
- Encourages external hip rotation
- Improves seated posture
6. Garland Pose (Malasana)
Garland Pose, or yogi squat, is a powerful functional mobility pose that opens the hips, ankles, and lower back.
How to do it:
- Stand with feet slightly wider than hip-width.
- Turn the toes out slightly.
- Lower into a deep squat.
- Bring palms together at the chest and press elbows into knees.
- Lift through the chest and lengthen the spine.
- Hold for 5–8 breaths.
Benefits:
- Improves deep hip flexion
- Opens the groin and pelvic floor
- Supports natural movement patterns like squatting
Modification:
Place a rolled blanket under your heels if they lift.
7. Frog Pose (Mandukasana Variation)
Frog Pose is an intense but effective stretch for the inner thighs and groin.
How to do it:
- Start on hands and knees.
- Slowly widen the knees apart.
- Keep ankles in line with knees if possible.
- Lower onto forearms.
- Hold gently for 5–8 breaths.
Benefits:
- Deeply opens the adductors
- Increases inner hip mobility
- Helps counteract stiffness from repetitive movement patterns
Caution:
Go slowly—this pose can be very strong.
8. Happy Baby Pose (Ananda Balasana)
This playful pose gently decompresses the hips and lower back.
How to do it:
- Lie on your back.
- Bend your knees toward your chest.
- Hold the outer edges of your feet or shins.
- Open the knees wide toward the armpits.
- Gently rock side to side if it feels good.
- Hold for 5–10 breaths.
Benefits:
- Releases low back and hips
- Opens inner thighs
- Feels restorative and calming
9. Supine Twist
Although not a direct hip opener, twists can release surrounding muscles that contribute to hip and pelvic tension.
How to do it:
- Lie on your back.
- Hug one knee into the chest.
- Guide it across the body into a gentle twist.
- Extend the opposite arm.
- Hold for 5–8 breaths, then switch sides.
Benefits:
- Relaxes the lower back and glutes
- Improves pelvic mobility
- Eases compensatory tension around the hips
10. Reclined Figure Four Stretch
This is a beginner-friendly alternative to Pigeon Pose and is excellent for tight outer hips.
How to do it:
- Lie on your back with knees bent.
- Cross one ankle over the opposite thigh.
- Thread your hands behind the standing leg and draw it in.
- Keep the shoulders relaxed.
- Hold for 5–8 breaths, then switch sides.
Benefits:
- Gently stretches glutes and piriformis
- Safe and accessible for most people
- Helps relieve hip and lower back tightness
Tips for Practicing Hip-Opening Yoga Safely
To get the best results without strain, keep these guidelines in mind:
1. Warm Up First
Never jump into deep hip openers with cold muscles. Start with gentle movements like Cat-Cow, hip circles, or light lunges.
2. Breathe Deeply
Slow, steady breathing tells the nervous system it’s safe to release tension. Exhale fully into tight areas.
3. Avoid Forcing Flexibility
Hip mobility is not about pushing deeper at all costs. Sharp pain, pinching, or numbness means back off.
4. Use Props
Yoga blocks, blankets, bolsters, or cushions can make poses more supportive and effective.
5. Practice Consistently
A 10–15 minute routine 3–5 times per week often works better than one long session once in a while.
A Simple 10-Minute Hip Mobility Flow
If you want a quick routine, try this sequence:
- Cat-Cow – 1 minute
- Low Lunge – 1 minute each side
- Lizard Pose – 1 minute each side
- Bound Angle Pose – 1 minute
- Reclined Figure Four – 1 minute each side
- Happy Baby – 1 minute
- Supine Twist – 30 seconds each side
This short flow can be done in the morning, after workouts, or at the end of the day.
Conclusion
Tight hips are incredibly common, especially in a world built around sitting, repetitive movement, and stress. But stiffness does not have to become your normal. With the right yoga poses, you can gradually rebuild hip mobility, reduce discomfort, and restore a more natural sense of ease in your body.
The most effective approach is not aggressive stretching—it is mindful, consistent practice. Poses like Low Lunge, Pigeon, Garland, Bound Angle, and Reclined Figure Four help release tension while also improving the way the hips move and function. Over time, these movements can support better posture, less lower back strain, smoother workouts, and greater comfort in everyday life.
Start gently, listen to your body, and focus on progress rather than perfection. Your hips respond best to patience, breath, and regular care. Even a few minutes a day can make a meaningful difference.
FAQs
1. How often should I do yoga for tight hips?
For best results, practice hip-opening yoga 3 to 5 times per week. Even short sessions of 10–15 minutes can improve mobility over time.
2. Can yoga help hip pain?
Yoga may help ease tightness-related discomfort by improving mobility, circulation, and muscle balance. However, if you have sharp pain, joint pain, arthritis, or an injury, consult a healthcare professional or physiotherapist before practicing.
3. What is the best yoga pose for tight hips?
There is no single best pose for everyone, but Low Lunge, Pigeon Pose, Reclined Figure Four, and Garland Pose are among the most effective for many people.
4. Is hip mobility the same as flexibility?
No. Flexibility is how much a muscle can lengthen, while mobility is your ability to move a joint actively and with control through a healthy range of motion. Yoga can improve both.
5. Can beginners do these hip-opening poses?
Yes. Many of these poses are beginner-friendly, especially with props and modifications. Reclined Figure Four, Bound Angle Pose, and Happy Baby are great starting points.
6. Why do emotions feel stored in the hips?
Many yoga practitioners describe the hips as an area where stress and tension accumulate. While this is partly anecdotal, the hips are closely linked with posture, protective muscle guarding, and nervous system tension—so releasing them can feel emotional or deeply relieving.